Designing an Image to Represent a Character
May 20, 2010
 Tara Seale posted details on a fun visual rhetoric and writing activity she recently used with students on the NCTE Secondary Section Blog. The activity, inspired by a similar task described by Shelbie Witte, asks students to design and explain a tattoo for a character from Romeo and Juliet. The blog entry includes links to the assignment sheet, the rubric, a sample essay, and a number of sample tattoo designs.
Connecting to Other Literary Tattoos
The assignment can be easily linked to one of the Literary Lists of “Ten Best” from the UK newspaper The Guardian, which I wrote about earlier this month.
Share Ten of the best tattoos in literature with students, or a few of the items listed in The Guardian article with students to get them warmed up. They may know of other literary tattoos to add to the list. This evening, I happened to remember Tennessee Williams’ The Rose Tattoo. Surely that’s a worthy patch of ink to add.
Other Assignment Possibilities
Naturally, the assignment could be completed for any work of literature. No reason you have to stick to Romeo and Juliet. Nor do you have to stick with characters from a work of literature. What about tattoos for some of the authors you’ve read in class?
If tattoo design isn’t appropriate for the students you teach, just modify the activity. Witte‘s original activity described the tattoos as a mind of modern family crest. Just have students design crests if tattoos would cause uncomfortable conversations with family or administrators.
If you still want the modern-day edge to the activity, have students design a personal logo or icon for a character. Ask students to think of the kind of image someone might post in place of a photo on a Facebook profile or a similar website.
In terms of publication, you can follow Seale‘s technique and have students submit images and an essay, but if you have the resources available, you can try a more technological bent:
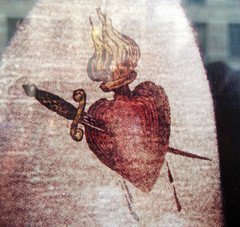
- Students might create Powerpoint presentations that layer the different portions of the image together and include text or audio explanations of the items. For instance, for the image in the photo above, the presentation might start with the basic outline of the heart, then shade red, add the flame, and finally add the dagger—each on a separate slide.
- Using basic mouseover Javascript and pop-ups, students might make a webpage which features the image and explains the reason behind different aspects of the design when the viewer drags the mouse over them.
- Use an image maps with alt text, but the length of students’ explanations would be quite limited. Javascript pop-ups would give them more room.
- Publish the designs on Flickr and have students use the “Add Note” feature to identify specific portions of the image and then include related explanations.
No matter what option you choose, the assignment pairs visual aspects with critical thinking and communication. It’s a fun activity that can be used with students from kindergarten to college. Just adjust the requirements to fit students’ abilities and the pedagogical goals of the class.