Stop, Read, & Apply: Guided Revision Activities

Earlier this year, I participated in a conversation on collective feedback during a Faculty Office Hours session (an online chat for teachers of professional and technical writing). Collective feedback, a strategy examined by Lisa Melonçon (University of South Florida, @lmeloncon on Twitter) in a five-year study (see her resources online), provides the whole class with details on frequent errors found in the drafts for the course, replacing some, if not all, individual feedback on projects. The process gives the instructor the chance to review common errors with everyone, eliminating the duplication of explaining to each student individually.

Building on Melonçon’s research, Dr. Sara Doan (Kennesaw State, @SDoanut on Twitter) described an in-class activity that she uses to guide students through revision of their projects. She explained that she would tell to the class that she was going to review “Ten issues you all need to fix.” She then asked students to open a copy of their project on their computers. Once students were ready, Doan then stepped students through common errors that they should correct in their drafts. For example, she asked students, “Is your name the biggest thing on your résumé? If not, you need to fix it.”

I love this strategy. I have given students checklists and rubrics to use as they evaluate their drafts, but the same common errors persist. The challenge for me is that my classes are all online. I cannot gather students and ask them to all open their projects so I can walk them through revision strategies.

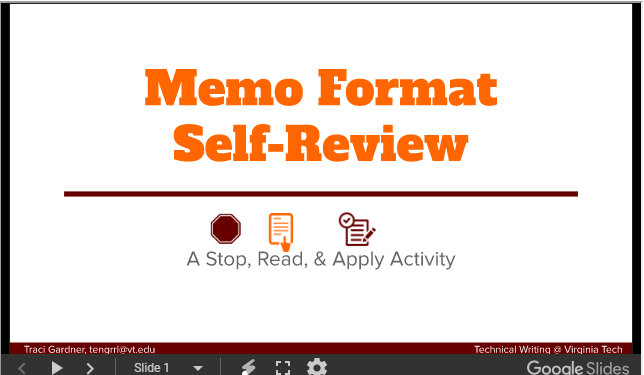
I created a Google Slides presentation (click on the screenshot below) to solve the problem, calling it a “Stop, Read, & Apply” activity.

Stop, Read, and Apply Slides screenshot. Click to view the slideshow.

The instructions essentially match those that Doan used: Students open their project, and then advance through the slides, stopping on each one to read the details on the common error and then apply that advice to their drafts. To focus students, the slideshow addresses only common errors in memo format. If the activity works, I will create similar slideshows for other common issues students can review as they finish their work.

Because the slides are online, I can also use them in feedback to students. All I have to do is open the Slides file in a new browser tab, advance the presentation to the slide I want to reference, and copy the link from the browser. For instance, I can link directly to the slide on eliminating opening greetings in a memo. So simple!

I hope that this slideshow-based system will slow students down, encouraging to check their drafts more carefully. Further, I can easily adapt it to any course and assignment I might teach. I am eager to see if the activity helps students address common errors. I’d love to hear your feedback on the strategy as well. What do you think? Would you use a similar resource in your courses? Are there “Stop, Read, & Apply” activities you would like to see in a future post? Leave a comment below and tell me what you think!

This post originally published on the Bedford Bits blog.
A Grace Period Update

Grace period catRecently, several colleagues have asked me about my grace period, which is part of my late policy on student work. Their interest encouraged me to write an update on how it’s been working.

I began using a grace period in 2013, and I’ve used it ever since. When we talk about students and their requests for extensions, someone usually talks about the number of family deaths that students mention in their requests for more time to get their work done. I’m happy to report the grace period means that I never read that kind of an extension requests. That’s right! No grandmothers are killed in my classes!

So how does the grace period work? Below is the statement that I include in my syllabus for the summer session. Canvas, which is mentioned in the policy, is our course management system (CMS):

Late Policy (Grace Period)

My late policy includes a grace period that should cover most problems that come up, whether academic conflicts, an illness, a religious holiday, or a personal issue. It applies to most graded work and can be used multiple times. You do not need to ask in advance or explain why your work is late. Just take advantage of the grace period, as explained below, for any work OTHER than your final exam:

  • The due date is the day that your work is due (usually Fridays). Every student has a 3-day grace period after the due date during which the project can still be submitted.

  • The grace period occurs between the due date and the deadline. Work submitted during the grace period will be marked as late in Canvas; however, there is no grade penalty for work submitted during the grace period.

  • The deadline comes 3 days after the due date (usually Mondays) and is the final moment that Canvas will accept a project (listed as the “available until” date in Canvas). There are no extensions on deadlines. If you do not turn in your work by the end of the grace period, you receive a zero for that activity, and you cannot revise. Unlimited, punishment-free revisions are NOT intended to support those who never did the work in the first place.

Final Exam: There is no grace period or make-up option for your final exam. Your final exam must be submitted by the due date (11:59 PM on Saturday, August 17) so that I can turn course grades in on time. If you have three exams on Saturday, August 17, let me know and we can make alternative arrangement.

Extenuating Circumstances: In the case of extenuating circumstances, let me know immediately. I understand that things happen. To pace course work for everyone, I will not post work early to resolve a conflict. If you let me know reasonably ahead of time, we can find a solution. As long as you are honest and timely in letting me know what’s going on, we can try to work something out.

Religious Holidays & Events

Please take advantage of the grace period explained in the Late Policy section above if the due date for any work in this class coincides with a religious holiday that you celebrate. Please let me know before the holiday if the grace period will not be adequate, and we will come up with an alternative plan.

I have learned a few lessons in the six years that I have used the Grace Period system. After some experimentation, I settled on three days as the length of the grace period. Longer grace periods interrupt progress on the work students need to do. At one point, I used a week-long grace period. Unfortunately when a student turns in a rough draft a week late, she can’t use any of the revision strategies we are talking about during the next week of the course. Three days seems to be just right.

I also learned to warn students not to use the grace period to procrastinate. We will begin working on the next project as soon as the due date passes. During the grace period then, students will end up working on two projects at once. If they procrastinate too much, they may be behind all term. I advise them at the beginning of the class to try to keep up with the due dates, and I remind them throughout the term to try to catch up if they do fall behind.

Others have described this system as humane and supportive. Those are great advantages to be sure. I’m selfish though. I created this policy for myself. I no longer have to weigh the believability of student excuses nor respond to those email messages asking for extensions. The grace period is one of the best policies I’ve made as a teacher.

Do you have a policy that has made a big difference in your teaching? I’d love to hear about it. Tell me in a comment below. I look forward to hearing about what works in your classroom.

This post originally published on the Bedford Bits blog.

Where to Find Public Domain Videos

Public Domain video from Library of Congress
Duck and Cover! by the Federal Civil Defense Administration

If you ask your students to create video projects, today’s post is for you. Showing students where to find public domain videos will give them thousands of free-to-use videos that they can clip or embed fully in their work. These resources exponentially increase their options beyond what they can gather by filming their own footage and using short clips from copyrighted material under Fair Use.

As I explained last month, Public Domain Assets have no copyright restrictions, so students can use these resources in their own work without worrying about permissions or take-down notices. All they need to do is cite their sources in an appropriate way. NASA’s Videos and Ultra Hi-Def Videos and the National Park Service, Multimedia Search from my last post, for instance, provide high-quality video footage that students can use freely in their projects.

Last week, I shared where to find public domain images, and in today’s post, I’m giving you details on some of the best public domain video resources available. These collections are arranged by the different kinds of resources that they offer, so students may find footage relevant to their subject areas at any of them.

Public Domain Search Sites and Collections

Prelinger Archive
This archive focuses on ephemeral films, which the site defines as advertising, educational, industrial, and amateur films. The collection includes a subset of home movies and has a variety of search filters that can help students find relevant footage for their projects.

Feature Films, from the Internet Archive Moving Image Archive
These public domain videos include feature films, short films, silent films, and trailers, such as the William Castle film House on Haunted Hill. The collection does include nudity (such as shorts featuring strippers) and graphic images (such as a U.S. Department of Defense film on Nazi Concentration Camps).

FedFlix, from the Internet Archive Moving Image Archive
A collection of videos from the U.S. government, this archive includes a variety of historical movies (like the Duck and Cover! video above) as well as movies related to such areas as the military, the FDA, and law enforcement.

U.S. Government Agencies, on YouTube
Many government agencies post their public domain videos on YouTube, making them widely accessible for student projects. Here are some examples that are worth sharing with students:

Students can embed videos from these collections into their projects, but they cannot download the videos without violating YouTube’s Terms of Service (unless the video has a download option).

Final Thoughts

If students are working on documentary projects or narrative projects, these public domain collections are likely to include resources that they can use. The ways that they can use the footage vary, so check the details on the sites to ensure that students abide by the policies of the collections they are interested in.

If you know of additional collections of public domain videos that are appropriate for student projects, please share them. The more resources available for students to use, the better! Just leave the details in a comment below. I look forward to hearing your experiences with using public domain resources in the classroom.

This post originally published on the Bedford Bits blog.

Where to Find Public Domain Resources

Illustration of Frederick Douglass
Public Domain Illustration of Frederick Douglass

In my last post, I shared details on Encouraging the Use of Public Domain Assets in student projects. Public domain images, video, text, and audio provide free-to-use, copyright-free resources that students can incorporate in any of their work, such as illustrating a pamphlet, creating a slideshow, or producing a video.

The public domain illustration of Frederick Douglass on the right, for instance, could be used in a student project, with details on its source in the Flickr collection of the Internet Archive Book Images as well as the illustration’s original source.

The challenge with public domain resources is knowing where to find them–and that’s my topic this week. I will share several subject-specific sites, and then I conclude with collections that cover a variety of topics. The sites I am sharing do include some video and audio resources, but the majority focus on images.

Public Domain Search Sites and Collections

The National Aeronautics and Space Administration (NASA)
As I mentioned last week, NASA is the ideal source for any student working on aviation, aeronautics, or space-related topics. The NASA website includes three different kinds of multimedia:

Because NASA is a government agency, all of NASA’s multimedia are usable within public domain permissions.

National Park Service
Students can find resources on historical locations, natural landscapes, and the inhabitants of those landscapes. The National Park Service, Multimedia Search can help students find such resources as photos of the Martin Luther King, Jr. Memorial and a video on Preserving the Historic Orchards at Manzanar National Historic Site (a WWII Japanese Internment Camp). The site includes photos, videos, audio, and webcam footage. Do remind students to check usage rights as they decide on resources to use. Most of the materials are in the public domain, but there are some exceptions.

U.S. Department of Agriculture (USDA)
The USDA Agricultural Research Service maintains an Image Gallery Search that includes photos related to subjects such as crops, animals, food, insects, and lab research. The USDA Agricultural Research site also includes a collection of videos, issued from 1996 to present. The videos focus on various research and news stories, such as this video of Honey Bees Tossing Out Varroa Mites.

National Oceanic and Atmospheric Administration (NOAA)
The collections in the NOAA Photo Library include all the images from the National Weather Service, highlighting both storm photos and unusual meteorological phenomena. The library also includes collections on Fisheries, Gulf of Mexico Marine Debris, and national marine sanctuaries.

Flickr Resources
Many governmental agencies have collections on Flickr, and you can quickly find them by visiting the USA.gov Group Photostream. The group combines the photostreams of official U.S. federal, state, and local governments on Flickr, with collections from groups ranging from the U.S. Corps of Engineers to the Peace Corps.

The Commons on Flickr is an international group of cultural institutions that provide public domain images, such as the Smithsonian Institution on Flickr and the British Library on Flickr. The group includes museums, historical societies, religious archives, and university collections.

Wikipedia Public Domain Resources
Wikipedia uses public domain images on many of the entries on the site. As a result, Wikipedia maintains a list of Public domain image resources. The dozens of sites listed repeat some of the resources above (such as the British Library on Flickr), but they also include sites that organize images from other collections. While the sites above are all reputable and reliable, the sites on the Wikipedia page may not be. If you recommend this page to students, spend some time talking about how to evaluate Internet resources.

Final Thoughts

In addition to knowing where to find public domain resources, students need to know how to cite the resources they include in their projects. I talk about documentation before students even begin their search for assets to help ensure they avoid citation errors. To my way of thinking, reminding students to gather citation details for a photo is just like reminding them to write down the page number for a book quotation they plan to use.

This week’s links favor photos and illustrations that can contribute to any multimedia project. There are times when students will want to go beyond still images however, so I will share collections that focus on video footage in my next post. Until then, let me know if these sites are useful or share some of your own favorite public domain sources. Just leave me a comment below. I can’t wait to hear from you.

Image credit: Illustration of Frederick Douglass from Internet Archive Book Images, used under public domain.

This post originally published on the Bedford Bits blog.

Encouraging the Use of Public Domain Assets

Photo of Earth from space, showig the North American Continent

Image credit: NASA

If your students are creating projects that include images, video, and audio, public domain resources can contribute to amazing work that avoids many of the headaches of using copyright-protected assets. Since public domain assets are free of copyright protections, students can freely incorporate them into their projects without asking for permission or evaluating them for fair use.

Here’s an example: If a student needs an image of Earth for a project, going to the NASA site for the photo (like the one on the right) is the best choice. Because NASA is a government agency, its work is automatically in the public domain. The student will find hundreds of high resolution, free images that can be incorporated into any project without asking for permission. All she needs to do is provide attribution and documentation for the source. Likewise, if the student is creating a video and needs a clip of the planet, she can find everything she needs on the NASA Videos site. If anything, she will have difficulty choosing among the many options.

To encourage students to take advantage of the benefits of using public domain resources, I created a one-page overview of the basic details of what I see as the three most important questions people tend to have. I used the same model I did for previous resources on why you should use documentation and what needs to be documented. As in the past, I created the page below (shown as an image) on “Using Public Domain Assets.” The page is also available as a Google Doc or a PDF to provide full accessibility to students.

Using Public Domain Assets in JPG form. Use Google Doc or PDF for accessibility to screen readers

This overview outlines the details that I hope will encourage students to search for public domain resources to use in their projects. Once we have reviewed this information, I would share places to find public domain resources as well as details on how to indicate credit for the creator and document their public domain sources in their projects. I’ll talk about those topics in future posts.

Do you have questions about encouraging students to use public domain materials? Do you have feedback on my one-page overview? I would love to hear from you in a comment below!

Photo credit: Taken with NASA’s Moderate Resolution Imaging Spectroradiometer aboard the Terra satellite.

This post originally published on the Bedford Bits blog.

A Feedback Policy with Unintended Positive Results

Hands of a white person using the trackpad on a Macbook AirEarlier this year, I shared my strategy to bribe students by offering extra points for those who turned in their work before Spring Break. I had some success, but there is still room for improvement. I am currently teaching a six-week summer session class, and I’ve accidentally found a strategy that encourages students to turn in work sooner, rather than later.

The challenge of a summer class is jamming fifteen weeks of work into six weeks. Every day in the summer needs to cover as much material and work as two and a half days in the fall or spring classes. My normal routine is to have a rough draft due one week and the final draft due the next week. That schedule allows me to provide feedback on the rough drafts so that students can use the information as they revise.

As I set up the schedule for the course, I realized I would be unable to keep that set-up in place. Realistically, I have to cover a new project every week, assigning the project on Monday and then asking for a rough draft due on Wednesday and a final draft due on Friday. My late policy gives students a three-day grace period, during which they can still turn in their work without any penalty.

I bet you can see the problem. I cannot push the rough draft any earlier in the week if I want to allow students time to process and work on their projects. I decided to tell students that I could not give them feedback on rough drafts that were turned in after Wednesday. Even with the small class size during the summer, it isn’t realistic to think students can turn in drafts later and still get feedback before the final draft is due. I added this paragraph to the assignment:

I will not provide individualized editing or revision feedback on rough drafts submitted after 11:59 PM on Wednesday, July 17. I will provide everyone with collective feedback that goes over the issues that I see in the drafts all members of the course submit. I may use excerpts from your draft to provide collective feedback to the class, based on the Anonymous Use of Student Texts policy.

There is no grade penalty involved. Students earn the same number of points no matter when they turn in their drafts. The firm deadline only relates to the individualized feedback involved.

The surprise for me came that first Wednesday night when I checked to see how many drafts had been submitted. Eleven of my fifteen students had turned in a draft! That’s an amazing 73% of the class, far outweighing the 31% who turned work in early during the spring term. Amazing!

I feel a little selfish about the policy. After all, my job is to give students feedback. Within the time constraints however, it was the only option that seemed reasonable. I never expected the policy to entice so many students to stay on track and turn work in on time.

It seems as though I have found a bribery strategy that is working. Will it last through the entire term? I’ll have to let you know after a few more assignments. I am certainly wondering whether I should try it in the fall as well. What do you think? Do you limit the feedback that students can receive from you? I would appreciate hearing from you. Just leave me a comment below.

Photo credit: wocintech (microsoft) – 114 by WOCinTech Chat on Flickr, used under a CC-BY 2.0 license.

This post originally published on the Bedford Bits blog.

Design Principles from Career Field to the Writing Classroom

Virginia's Oldest Covered Bridge, Humpback Covered BridgeStudents typically know about design in their own career fields. Civil engineering majors, for instance, typically know what a good bridge, a well-designed intersection, or an efficiently designed airport looks like. They may not be able to design and build one yet, but they can tell the difference between a good design and a bad one.

This active learning strategy taps into students’ prior knowledge on design and then asks them to apply what they know to document design. The activity has two parts: first, students document their own knowledge, and second, they collaboratively draw conclusions about design and consider how the concepts apply to writing. The Individual Activity described below is presented as it would be to students while the Follow-Up Group Activities are presented as instructions for the teacher.

The Individual Activity

Before we begin our discussion of the principles of design that apply to writing, I want you to think about how design principles shape work in your own career field. For this activity, find an object related to your career field that demonstrates strong design principles and then prepare an informal presentation that explains the design principles to your group. Using the presentations from all your group members, you will reflect on what we can say about design across disciplinary and career fields.

Instructions

  1. Focusing on your career field, choose a well-designed object. A civil engineer could choose a bridge. A software developer could choose a program interface. A packaging science major could choose a reusable packaging system. A building construction major could choose a hand or power tool. Whatever you choose, be sure that you would say it is well-designed and that you are familiar enough with the object to talk about it.
  2. Brainstorm a list of features that demonstrate the object’s good design. Just jot down the features that come to mind. You will come back to this list later in this activity.
  3. Find information on your object that you can share in class. Ideally, find digital versions that you can incorporate into your presentation. Possible sources include the following:
    • Photos or screen shots
    • Drawings or illustrations
    • Instruction manuals
    • Schematic diagrams
    • Blueprints
    • Advertising materials
    • Demonstration or instructional videos
  4. Review the information you collected for additional features that point to the fact that the object is well-designed. As you find characteristics, add them to your brainstormed list.
  5. Create a chart that aligns characteristics that make the object well-designed with the evidence from the information you have gathered. For instance, you might point to details in a photo that demonstrate a feature that contributes to the design. You can add or remove features from your list as you work.
  6. Create a slideshow presentation to share the features you have identified as integral to a well-designed object in your field, following these guidelines:
    • Add a title slide that shows an image of your object and provides a title that identifies the object. For instance, you might use a title such as “Strong Design in the Humpback Covered Bridge.”
    • Add a slide for each characteristic of good design you have identified, following these suggestions:
      • For the title of the slide, use a word or two to name the characteristic.
      • Include the evidence that you found that demonstrates that characteristic.
      • Add a source citation for your evidence.
      • Do not add any more description or bullet points since you will explain the details to your group.
      • Add speaker’s notes if you like.
  7. Practice your presentation so that you are ready to share your well-designed object with your group. Aim to share your information in two to three minutes. Revise your presentation as necessary after your practice session.

Follow-Up Group Activities

  1. After students have their presentations ready, arrange the class in small groups and ask students to share their presentations with one another. Have students listen for similarities among the principles that are presented. Remind them that the same underlying principle or idea may not use the same name in every career field.
  2. Once students complete the individual presentations to their groups, ask them to identify five characteristics that transcend a single career field. Explain that students are looking for similarities among all the principles that have been presented. If students need additional help, suggest that they look at what the principles focus on. For instance, are there principles that focus on what the object looks like? Consider how they are similar.
  3. Have groups share their five characteristics by writing them on a section of the board, on a Google Slide, or on chart paper. Ask each group to explain their five characteristics briefly.
  4. Use a full-class discussion to look for patterns and similarities among all of the characteristics that have been posted. Ask students to share their immediate observations, and use questions to help them see any details that are less obvious.
  5. Display a well-designed document, or pass out copies for students to observe. You can also point to a document in your textbook. Ideally, choose an example related to an current or upcoming writing assignment.
  6. Invite students to apply the characteristics posted by their small groups to the example document. As necessary, ask questions that help students apply their career-field knowledge to the example. For example, ask students to apply design principles about an object’s appearance to the appearance of the example document.
  7. Synthesize student observations by listing the characteristics that apply to document design. Take advantage of the opportunity to introduce and discuss key principles of design (such as contrast, repetition, alignment, and proximity) by connecting to the principles that students have identified.
  8. Follow this activity with one of the ideas from Examining Design Principles through Active Learning Tasks or ask students to apply the design principles discussed in the class sessions to the drafts they are currently working on. Alternately, students can apply the design principles to their presentation slides.

Final Thoughts

Writing and document design can feel alien to students whose area of expertise lies outside the writing classroom. This activity makes students experts in the classroom, telling us all about their career field and then applying that expertise to document design. Students work as active learners, building connections between what they know and the work of the writing classroom. How do you help students understand concepts in the writing classroom that may not seem obvious to them? Do you have classroom activities or assignments to share? I would love to hear from you. Just leave me a comment below.

Photo credit: Virginia’s Oldest Covered Bridge, Humpback Covered Bridge by Don O’Brien on Wikimedia Commons, used under a CC BY 2.0 license

This post originally published on the Bedford Bits blog.

Writing a Course Manual

Cover page of Technical Writing Course Manual, featuring the document's title and a collage of photos of people writing in the workplaceI am currently revising my Technical Writing Course Manual, in preparation for my summer session course, and I want to share the document and how it has worked this week. I first created the manual, using a Google Document, for my spring courses to eliminate the dozens of web pages that I had created previously. The manual addressed several challenges that I had encountered in courses:

  • With the information chunked out in a series of web pages, students had trouble finding details when they needed them. Placing everything in one manual meant the information was all in one searchable place.
  • Students frequently needed a direct link to a specific policy, explanation, or detail in the course materials. The headings in the Google Document let me link to discrete information in the manual.
  • Previously, I used a separate website for the kind of information included in the manual, but students were sometime confused about the need to go to a separate place outside the course management system (CMS) to find course information. The Google Document was easy to embed within our CMS, so I did not need to use a separate website.

The manual proved successful during the spring term. Students consulted it it regularly throughout the term. Whenever I looked at the embedded manual on the course homepage in the CMS, I saw a collection of anonymous animals, from the Anonymous Anteater to the Anonymous Wombat. I came to value all those anonymous animals as evidence that students were going back to the course documents long after the first days of the course. I’ve never had that kind of validation with a traditional syllabus.

One issue to address as I revise is the length of the manual. It currently comes in at 34 pages, and I’m still tweaking things. Naturally, I don’t expect students to read and memorize the manual; but what seems obvious to me may not be obvious to students. I have added the section below to explain how I expect students to use the manual in the course:

How to Use this Manual

This course manual is a guide to English 3764, Technical Writing, as taught by Traci Gardner at Virginia Tech. The manual is arranged in three large sections: 

  • Syllabus and Basic Course Information: all the information typically included on a syllabus, including details on course assessment and the textbook.
  • Requirements: explanation of the work that is expected in the course.
  • Policies: all the guidelines that apply in the course, listed in alphabetical order.

Do not feel compelled to read the manual cover-to-cover. This guide is a reference you should review at the beginning of the course and then return to throughout the term as necessary. 

At the beginning of the course, you should skim through the entire manual. Read the information that provides key details on the class carefully, such as the “Tentative Course Schedule” and the “Late Policy.” Pay attention to the kind of information that is included in the manual as you skim. 

During the course, check this manual for the answers to your questions first. You can check the Table of Contents as well as use the Find command to search the manual. Most general questions about the course are answered here.

I’ll emphasize these instructions the first week of the course as well, when I point out some of the key details students should review. I’m looking forward to a second term using the manual, and I hope it will be a positive experience this term too. As you check out the document, note any questions or suggestions you have and leave them below as a comment. I’m planning to use the document again for the fall semester, so I can use your advice and feedback!

This post originally published on the Bedford Bits blog.

Political Memes from the Internet to Protest Posters

As I have written in my last two posts, I presented on the ways that image macro memes (the memes that usually consist of an image and a text caption) at the Computers and Writing Conference in June. Specifically, I focused on political memes and how these memes are a form of activism as the people who make and share them spread their message.

As Limor Shifman explains in her book Memes in Digital Culture (2014), memes are a way of expressing opinions in political conversations, undertaking advocacy and grassroots action, and participating in political movements. Given these functions, political memes are perfect for the classroom: They ask students to use critical analysis, persuasion, and argument in authentic conversations.

Encourage students to think about the use of memes beyond Internet sharing by examining this version of the Distracted Boyfriend meme, updated to focus on gun control:

Distracted Bodyfriend Gun Control Meme

The meme was shared in a Tweet from @rachel_handler. It shows the distracted boyfriend with the object label “Trump,” looking back at the woman in red who is labeled “NRA,” while his girlfriend who is labeled “Our Lives” looks at him in disgust. Under the meme, the political protest poster states, “We call BS!” The text of the Tweet provides the context where the meme was shared: “great sign my little sister sent me from today’s #nationalschoolwalkout pic.twitter.com/i0WqRMdaDF.”

What interests me about this image is that the Internet meme is no longer bound by the Internet. Instead, as was also the case with the Grumpy Cat protest poster I shared previously, the meme has been recreated in an analog world, printed out in this case and glued to a piece of poster paper with an additional line (“We call BS!”) to emphasize the message.

The shift from Internet meme to protest poster seems a natural one. What works for political advocacy online can make a similarly strong message in an analog situation. While some Internet memes would not translate to nondigital messages (think of animated gifs and memetic videos), image macros make the transition smoothly. For more examples of memes on protest posters, check out the Medium post “Teens March With Memes.”

After students examine a meme that has crossed from the Internet to an analog existence, ask students to consider these questions:

  • Why would someone use a meme on a political protest poster?
  • How would the purpose of a political protest influence the kind of meme someone would choose?
  • What audience(s) would a political poster using a meme target? Consider specific posters and the memes they use.
  • Why do you think the poster maker made the choice of the specific meme for that specific poster?
  • What underlying messages does the meme on a particular protest poster communicate? Think about the assumptions and “unspoken” messages in the poster.
  • What existing meme template would be a better (or worse) choice for this message?
  • Why would someone use this Internet meme on an analog poster? What can you say about how it transitions from the Internet to a poster?
  • What guidelines would you propose to help someone choose and customize a meme for a political protest poster?

As you may guess, these question work students toward creating a rubric for effective memes, which can then be applied to their own political memes. My post last week offered a range of online tools that students can use to create memes.

Do you have ideas for using memes in the classroom? Do you have questions that you would like me to consider in an upcoming post about memes? Just let me know by leaving a comment below. I can’t wait to hear from you.

This post originally published on the Bedford Bits blog.

Image Macro Meme Makers

LOLcat defining Politics, with the captions, Politics: n - frum Greek. Poli - many, tics - blood sucking parasites
LOLcat defining Politics, with captions, Politics: n – frum Greek. Poli – many, tics – blood sucking parasites

Last week, I shared a Political Meme Scavenger Hunt activity, one of the resources that I also shared at the Computers and Writing Conference in East Lansing, Michigan last week. My session focused on how political memes work and strategies for using them in the classroom. Today I am sharing another resource from the session: online meme generation tools.

The tools listed below all create image macros, the kind of meme that consists of an image and usually some text caption. An image macro can also include an emoji or other drawing as part of the message. The LOLcat on the right is an image macro.

Constraints of Online Meme Makers

The meme generators I collected are free and offer many options. Those strengths come with a down side however. The sites appear to do little review of the memes that are generated and posted. Since the sites are free, they are wide open to anyone who wants to create an image-based meme. Some of the memes on the sites are problematic. You will find images that are racist, sexist, and graphic. Some of the meme templates are also problematic, relying on stereotypes or questionable images.

You will also find that trolls can attack a site, either making it inaccessible or overloading the site with questionable content. The screenshot below shows the recently created memes on the Meme Generator site at the time I was writing this post:

Attack on Meme Generator Homepage

The page was flooded with a pencil meme and text that taunt the website managers. The top left meme includes the caption, “The entire main page will be nothing but this meme.” Other messages on the page continue the theme, criticizing the website and boasting about the attack.

This example demonstrates the problems what you may encounter with using these sites. To address these issues, I suggest the following guidelines:

  • Review the site(s) you want to use well, and then narrow the list down. Choose the site(s) that best match your needs and local expectations for classroom appropriateness.
  • Recognize that these sites can and do change in a matter of seconds. A site that may have been fine when you checked the night before class could have a flooded homepage, like the Meme Generator site shown in the screenshot above.
  • Have a backup plan. If a site is down or has problem images when class meets, have an alternative ready.
  • Before asking students to make memes, discuss the nature of the site(s) with students so that they will not be surprised if they encounter problematic content. Explain the ground rules for your class use of the resources–what students should do if something problematic appears on their screens, and what kind of content is appropriate for their own memes.

Generators for Specific Memes

One way to avoid problematic meme templates is to send students to specific generators that match the topic you are discussing and that do not begin with an inappropriate image. All of the generators listed here could be used by those who attended my conference session to make political memes:

Meme Generators

These links take you to templates with a range of options. Some of the images may be inappropriate, but these sites give students the widest number of options. Another way to avoid problematic meme images and templates is to choose one of the sites that allows the upload of students’ own images. Students will need to take photos or find images to use, but avoiding the templates does limit the likelihood of encountering inappropriate content.

Final Thoughts

Image Macro Memes give students a chance to combine social media and cultural knowledge with visual rhetoric. To be effective, the image and text have to work together to communicate their message. Students typically have experience with the genre. They know what makes a meme successful and what makes one fail, so their prior knowledge make image macros a strong tool for introducing the design and visual composing strategies that build upon their expertise.

Have you used memes in the classroom? Do you have advice to share or examples that you love? Add a comment below to tell me more. I’d love to hear from you.

This post originally published on the Bedford Bits blog.